Description
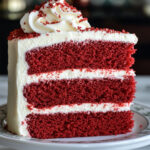
Indulge in the Irresistible Perfect Red Velvet Cake—a rich, velvety masterpiece with a hint of cocoa and a luscious cream cheese frosting. Moist, fluffy, and beautifully red, this classic dessert is perfect for any celebration. One bite, and you’ll be hooked! ❤️🎂
Ingredients
- Flour
- Cocoa powder
- Granulated sugar
- Vegetable oil
- Eggs
- Buttermilk
- Red food coloring
- Vanilla extract
- Baking soda
- Salt
- White vinegar
- Butter
- Powdered sugar
- Cream cheese
Instructions
Begin your delectable journey by preheating your oven to 350°F (175°C). An evenly heated oven ensures that your cake bakes perfectly, developing that wonderfully moist texture we all adore. Prepare pans by greasing and lining them with parchment paper – this helps the cake come out smoothly after baking.
In a large mixing bowl, whisk together the flour, cocoa powder, baking soda, and salt. Combining these dry ingredients first allows for an even distribution of flavors and leavening agents. Enjoy the rich chocolate aroma as it fills the air; it’s a sign of delicious things to come!
In another mixing bowl, beat the softened butter and granulated sugar until the mixture turns light and fluffy. This step is crucial as it introduces air into the batter, contributing to the cake’s beautiful rise. The color change and buttery scent will make you smile – it’s the sign that you’re on the right path.
Introduce the eggs, one at a time, into the butter-sugar mix, blending well after each addition. Then, mix in the vanilla extract. The eggs add richness, enhancing the cake’s moisture. As you stir, think about how these simple ingredients combine to create a symphony of flavors.
Now, pour in half of the buttermilk and mix it gently. Then, add the vibrant red food coloring, turning your batter into a luscious shade of red. Mix well until you achieve a beautiful, uniform color. This is where the artistry begins; it feels like painting, doesn’t it?
Gradually add the dry mixture to the wet ingredients, alternating with the remaining buttermilk. Be gentle during this process; overmixing can lead to a dense cake. Stop mixing as soon as you see no dry flour; your batter should be smooth and luscious—a true delight to the eyes!
Evenly divide the batter between the prepared cake pans. Smooth the tops with a spatula for an even bake. Place them in the preheated oven and bake for about 25-30 minutes. You’ll know they’re done when a toothpick inserted in the center comes out clean. The tantalizing aroma wafting through your kitchen during baking is pure bliss!
Once the cakes are out of the oven, let them cool in the pans for about 10 minutes before transferring them to wire racks. This cooling time helps the structure set. After they’re completely cool, it’s time to frost! Spread a generous layer of cream cheese frosting between the layers and on top. The creamy, tangy frosting balances the sweetness of the cake beautifully.
Notes
Storage Tips
After the cake is assembled, store it in an airtight container in the refrigerator. This helps maintain its moisture and flavor. The cake will remain delicious for up to five days, but it’s hard to resist devouring it sooner!
Freezing Instructions
If you’d like to prepare ahead, this red velvet cake freezes beautifully. Wrap each layer tightly in plastic wrap and then place it in a freezer-safe bag. It can last in the freezer for up to three months. Thaw and frost when you’re ready to indulge!
Serving Suggestions
For an extra touch of decadence, consider serving slices of the cake with a scoop of vanilla ice cream. The combination of warm cake and cold ice cream creates a dynamic dessert experience that everyone will love. Bright berries on the side add a refreshing contrast and a pop of color.
- Prep Time: 20 minutes
- Cook Time: 30 minutes