Introduction
In the hustle and bustle of daily life, finding a moment to indulge can feel like a precious gift. Imagine the aroma of freshly baked Delightful Rhubarb Scones wafting through your kitchen, evoking cherished memories of sunny days and laughter. This recipe isn’t just about creating a delightful treat; it’s about those little moments that bring us joy—the spontaneous gathering with friends, a quiet afternoon with tea, or a warm breakfast shared with loved ones.
These Delightful Rhubarb Scones are not only easy to make but also burst with flavor, making them the perfect addition to any occasion. Just picture the smiles around the table as everyone takes their first bite. That feeling of connection, comfort, and nostalgia can make even the busiest days feel special. Let’s dive into this delightful recipe that’s sure to bring warmth and happiness into your home.
Why we love this recipe: Rhubarb Scones
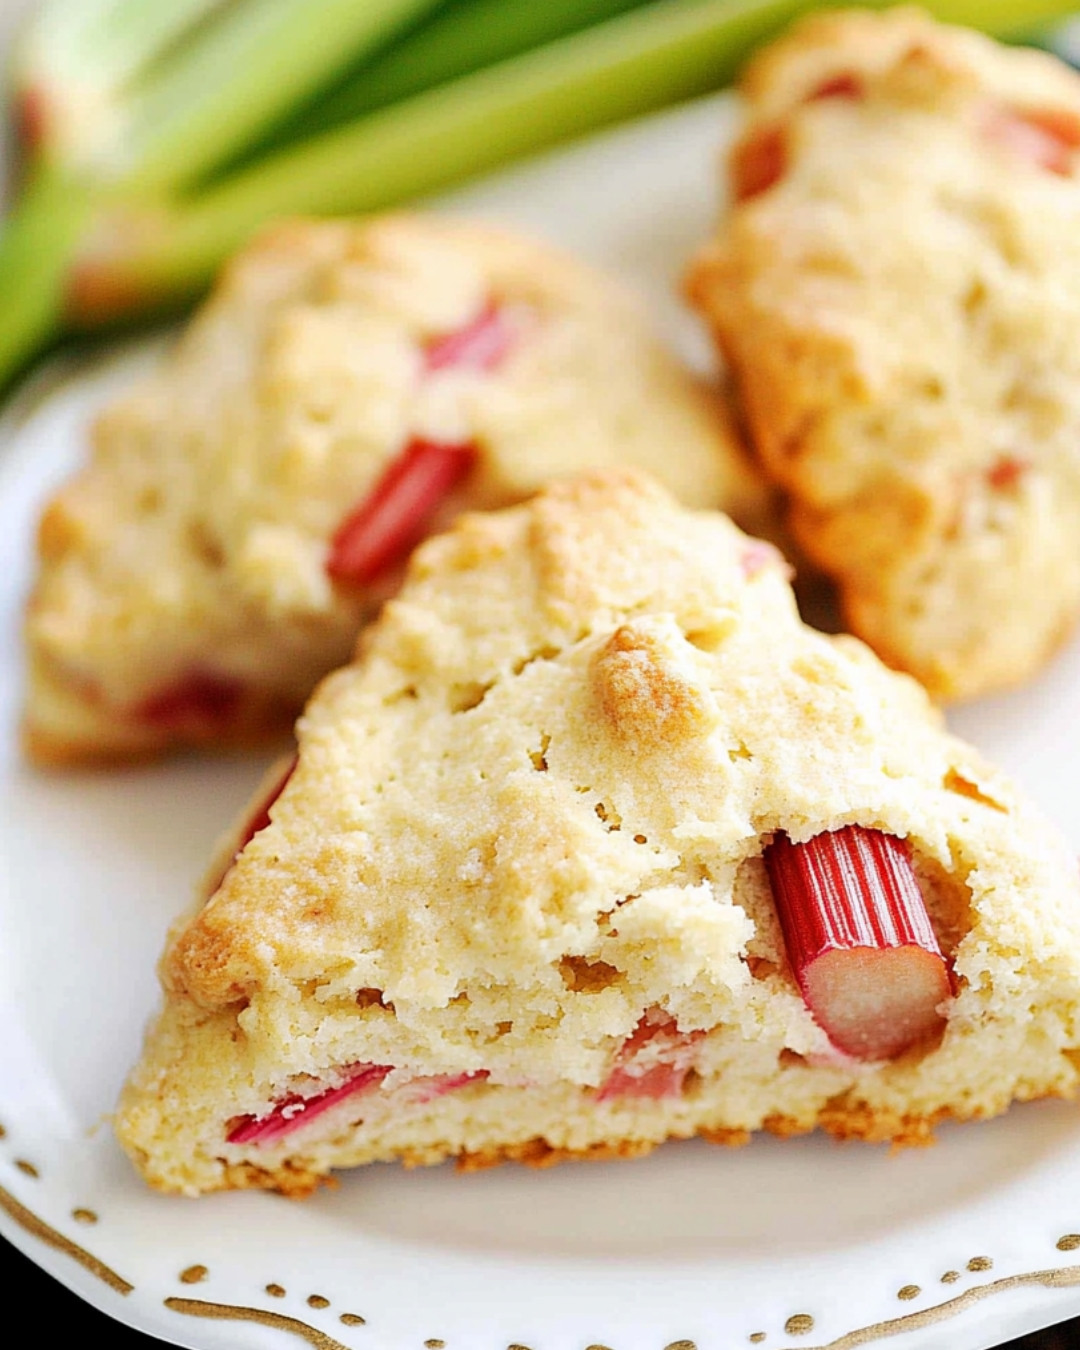
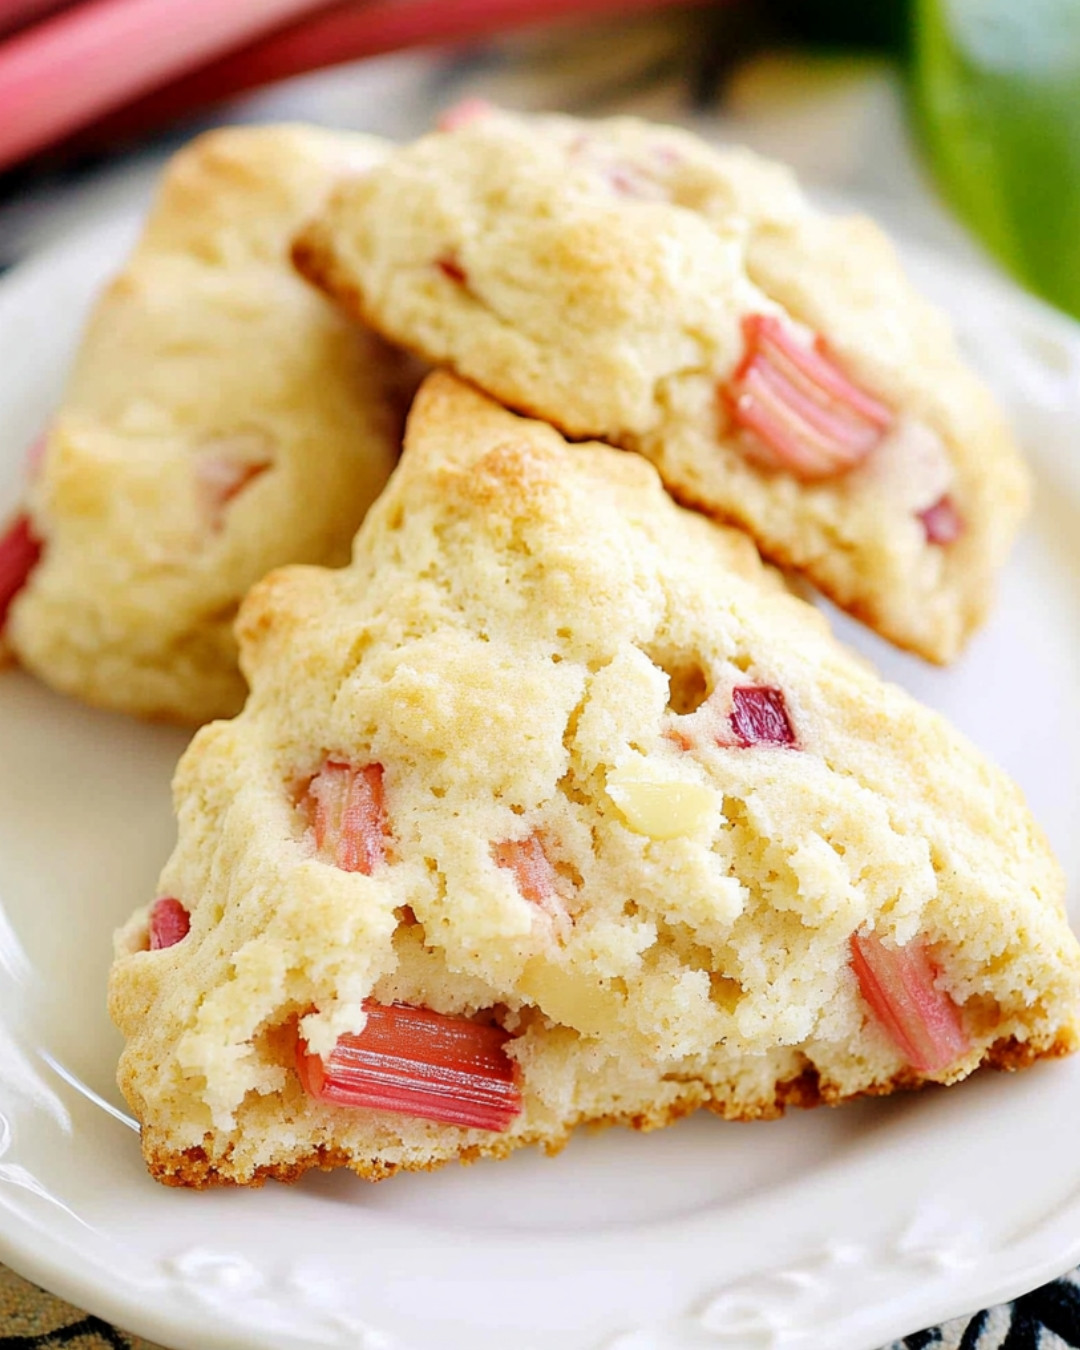
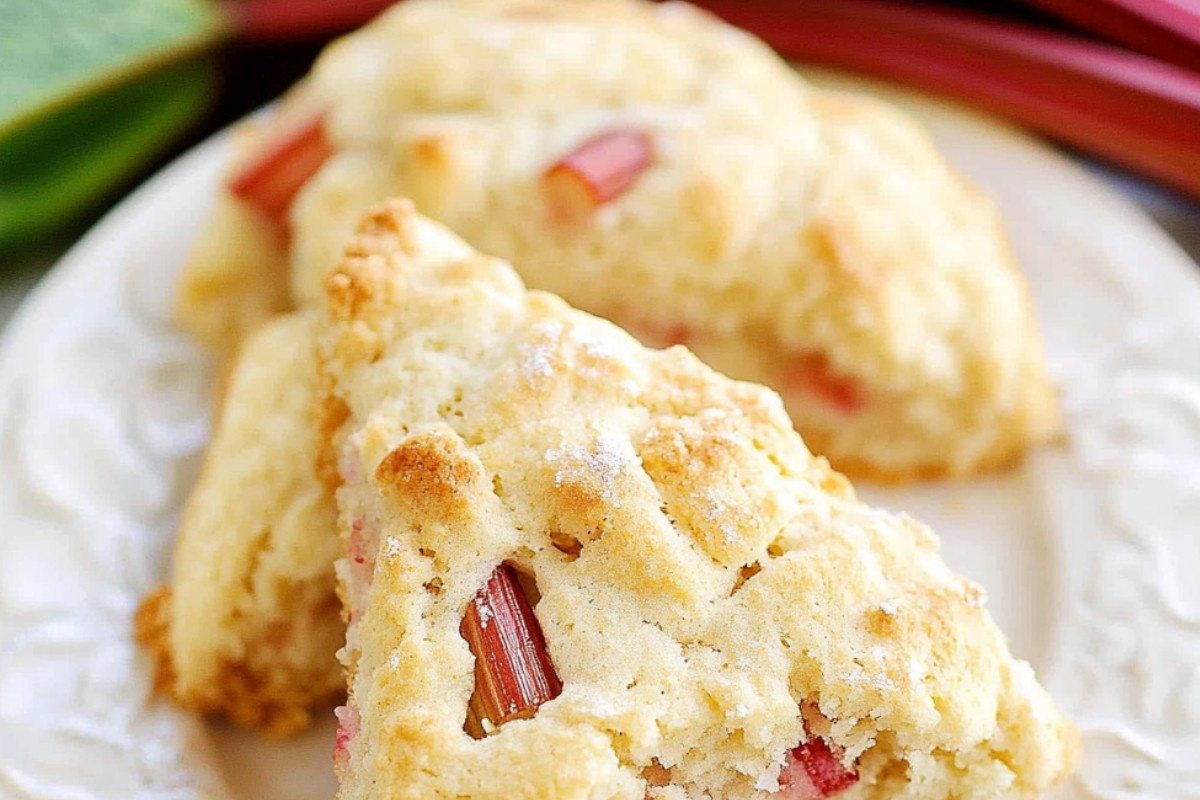
One of the best things about these Rhubarb Scones is their perfect texture. Each bite offers a fluffy interior with a slightly crisp edge, making them irresistible right out of the oven. The fresh rhubarb adds a delightful tang that balances beautifully with the sweetness, creating a flavor explosion that dances on your taste buds.
Another reason to adore this recipe is its simplicity. The ingredients are common pantry staples, so there’s no need for special trips to the grocery store. Busy lives call for quick solutions, and these Rhubarb Scones come together in no time, letting you focus on what truly matters—making memories with those you love. It’s a little slice of joy that can brighten even the cloudiest of days.

Step-by-Step Cooking Instructions
Now that you’ve got all the ingredients and tools ready, it’s time to transform fresh rhubarb into delightful Rhubarb Scones that will tantalize your taste buds. Each step will guide you through the process, ensuring your scones are light, flaky, and bursting with flavor.
Step 1: Preheat the Oven
Preheat your oven to 400°F (200°C). This initial step is crucial as it ensures your scones bake evenly and attain that golden, crispy exterior we all adore. Your kitchen will soon fill with the tantalizing aroma of freshly baked goods, preparing you for the deliciousness to follow.
Step 2: Prepare the Baking Sheet
Line a baking sheet with parchment paper. This not only prevents sticking but also makes for easy cleanup. Grab your parchment and place it on a baking sheet, smoothing out any wrinkles. You’re creating the perfect stage for your Rhubarb Scones to shine!
Step 3: Chop the Rhubarb
Dice your rhubarb into small, manageable pieces. Aim for about 1/2 inch in size to ensure they cook evenly within your scones. The vibrant pink and green hues of fresh rhubarb will inspire your inner baker, and the tartness they bring will perfectly complement the sweet scone dough.
Step 4: Mix the Dry Ingredients
In a large mixing bowl, whisk together the flour, sugar, baking powder, and salt. This combination of dry ingredients is the foundation of your scone. Take your time with this step – whisking helps to aerate the flour, resulting in light, fluffy scones. The sweet aroma of sugar combined with the earthy scent of flour fills the air, setting the mood for baking.
Step 5: Cut in the Butter
Add cold, diced butter to the dry mixture. Using a pastry cutter or your fingers, work the butter into the flour until the mixture resembles coarse crumbs. This step is vital for achieving that desirable flaky texture. It’s okay to embrace the mess; the buttery goodness will be worth it!
Step 6: Fold in the Rhubarb
Gently fold in the chopped rhubarb until just incorporated. Be careful not to overmix; you want the pieces to distribute evenly without breaking down. The promise of tart, juicy pockets of rhubarb nestled within your scone dough will surely make your heart skip a beat.
Step 7: Add the Wet Ingredients
In a separate bowl, blend together cream and an egg. Pour the wet mixture into the dry ingredients, stirring gently until everything is just combined. At this point, the dough should be slightly sticky but cohesive. It’s a tactile experience – embrace the feel of the dough as it comes together.
Step 8: Shape the Scones
Turn the dough onto a lightly floured surface. Pat it into a circle about 1-inch thick, then cut it into wedges or use a round cutter for classic scone shapes. Pick up each piece with care, as they are delicate, and place them on the prepared baking sheet. Visualize the delight on your friends’ faces when they taste your homemade Rhubarb Scones!
Step 9: Bake the Scones
Bake in the preheated oven for 15-20 minutes or until the tops are golden brown. Take a moment to breathe in the sweet aroma wafting through your kitchen. This moment of anticipation is what baking is all about, and soon you will be rewarded with warm, fresh goodies.
Step 10: Cool and Serve
Remove the scones from the oven and allow them to cool on a wire rack for a few minutes. Once cooled slightly, serve them warm with a touch of butter or your favorite jam. Each bite is a celebration of flavors, and you’ll find it hard to resist the second helping!
Detailed Directions and Instructions
Step 1: Preheat the Oven
Get the oven heating up to 400°F (200°C) while you prepare your ingredients. A properly preheated oven is critical for achieving an ideal baking temperature and texture, ensuring your Rhubarb Scones bake to perfection.
Step 2: Prepare the Baking Sheet
Grab a baking sheet and a roll of parchment paper. Lay the parchment flat on your baking sheet; this will save your scones from sticking and create a non-stick surface for easy removal.
Step 3: Chop the Rhubarb
Wash your fresh rhubarb stalks thoroughly, then slice off the ends. Cut the stalks into small, even pieces; think about 1/2 inch to maximize texture and flavor distribution in your scones.
Step 4: Mix the Dry Ingredients
In a large bowl, combine your dry ingredients: flour, sugar, baking powder, and salt. Whisk them together thoroughly, blending the sugar and baking powder into the flour for an even distribution.
Step 5: Cut in the Butter
Add cold butter pieces to your flour mixture. With a pastry cutter or your fingertips, blend the butter into the dry ingredients until the mixture looks similar to coarse crumbs. This step contributes to the flakiness of your Rhubarb Scones.
Step 6: Fold in the Rhubarb
Introduce the diced rhubarb into your crumb mixture, gently folding with a spatula until well combined. Avoid over-mixing to preserve the texture and maintain the freshness of the rhubarb.
Step 7: Add the Wet Ingredients
Combine cream and an egg in another bowl, whisking them together. Gradually incorporate this wet mixture into your dry ingredients, gently mixing until just combined.
Step 8: Shape the Scones
Lightly flour your work surface and turn out the dough. Pat it into a 1-inch thick disc and use a sharp knife or cutter to slice it into eight wedges or circles. Place each piece onto your prepared baking sheet.
Step 9: Bake the Scones
Slide that tray into the oven on the center rack. Set a timer for 15-20 minutes and watch as they puff up and turn golden brown. Enjoy the enticing smells wafting throughout your kitchen!
Step 10: Cool and Serve
After baking, allow the scones to cool on a wire rack for a brief moment. Serve these warm delights with butter or homemade preserves for an extra treat!
Notes
Flavor Variations
If you’re looking to spice up your Rhubarb Scones, consider adding nuts, chocolate chips, or a sprinkle of cinnamon into the mix. Each addition brings a new layer of flavor.
Storage Tips
Keep leftover scones in an airtight container at room temperature for a maximum of three days. For longer storage, freeze them, and just pop them in the oven to warm when the craving strikes.
Serving Suggestions
Try serving your Rhubarb Scones for breakfast or as an afternoon treat with tea. They can also make a charming addition to brunch gatherings, delighting guests with their bright flavors and flaky texture.
A Perfect Pairing: Rhubarb Scones with Cream
Imagine enjoying your freshly baked Rhubarb Scones paired with a dollop of whipped cream. The lightness of the cream complements the tartness of the scones, creating a symphony of flavors that dance on your palate. This combination is bound to elevate your baking experience to a new level!
The History of Scones: A Sweet Evolution
Did you know that scones originated in Scotland? Traditionally, they were made with oats and baked on griddles. Today, various adaptations emerge worldwide, especially with delicious fillings like rhubarb. Embrace this culinary history as you enjoy your homemade Rhubarb Scones, knowing you are partaking in a delightful global tradition.
Tips for Perfectly Flaky Scones
For the flakiest scones, use chilled ingredients, particularly when mixing in the butter. Ensure your oven is fully preheated before baking. Gently handle the dough; avoiding overworking it can make all the difference in achieving that airy texture!
Common Mistakes to Avoid
When making Rhubarb Scones, do not skip the chilling step for the butter, as this is crucial for flakiness. Avoid overmixing the dough since it can lead to dense scones rather than that delightful tenderness. Lastly, ensure you use fresh rhubarb for the best flavor and texture in your scones.

Key ingredients : Easy Rhubarb Scones
- 2 cups all-purpose flour
- 1/4 cup sugar
- 1 Tbsp baking powder
- 1/2 tsp salt
- 6 Tbsp cold unsalted butter, cubed
- 3/4 cup heavy cream
- 1 egg
- 1 tsp vanilla extract
- 1 1/2 cups chopped rhubarb
Preparation Time
- Prep Time: 15 minutes
- Cook Time: 20 minutes
- Total Time: 35 minutes
- Yield: 8 scones
Cook Techniques
Preparing the Rhubarb
Chop the rhubarb into small, uniform pieces to ensure even cooking and distribution throughout the Rhubarb Scones. Fresh rhubarb adds a vibrant tartness that enhances the overall flavor profile.
Cutting in Butter
Utilize a pastry cutter or your fingers to cut cold butter into the flour mixture until it resembles coarse crumbs. This technique creates flaky layers in the Rhubarb Scones, making for a delightful texture.
Incorporating the Wet Ingredients
Mix the wet ingredients gently into the dry mixture to avoid overworking the dough. A light hand ensures tender Rhubarb Scones that are not tough or chewy.
Shaping the Dough
Gently pat the dough into a circle on a floured surface, aiming for a uniform thickness. Cutting the dough into triangles or rounds allows for even baking and creates classic scone shapes.
Baking Technique
Bake the Rhubarb Scones until golden brown, keeping an eye on them towards the end of the baking time. This attention will ensure that they are perfectly cooked while maintaining their moist interior.
Serving and Presentation Ideas:
Present the Rhubarb Scones on a tiered cake stand for an elegant touch, perfect for afternoon tea. Pair them with clotted cream or a dollop of fresh whipped cream to enhance their flavor. They also work beautifully with a drizzle of honey or a sprinkle of powdered sugar for added sweetness.
People Also Ask:
What can I serve with Rhubarb Scones?
Accompany your Rhubarb Scones with clotted cream, jam, or fresh fruit for a delightful breakfast or afternoon treat.
How do I store leftover Rhubarb Scones?
Store any leftover Rhubarb Scones in an airtight container at room temperature for up to two days. For longer storage, freeze them wrapped in plastic wrap and place them in a freezer bag.
Can I use frozen rhubarb for Rhubarb Scones?
Yes, frozen rhubarb works well in Rhubarb Scones. Just thaw it and drain any excess moisture before adding it to the dough.
FAQ
Can I make Rhubarb Scones without dairy?
Absolutely! Substitute dairy milk with a non-dairy alternative and replace butter with coconut oil or a vegan butter substitute for delicious dairy-free Rhubarb Scones.
How do I know when my Rhubarb Scones are done baking?
The Rhubarb Scones will be golden brown on top and will spring back lightly when touched. A toothpick inserted in the center should come out clean.
Can I add other fruits to my Rhubarb Scones?
Yes! Feel free to mix in other fruits like strawberries or blueberries for a unique twist on your Rhubarb Scones.
Conclusion
Making Rhubarb Scones is not just about baking; it’s about creating a sense of warmth and connection. The tangy sweetness of rhubarb combined with a tender, flaky texture brings joy to any gathering, whether it’s a cozy breakfast at home or a delightful afternoon tea with friends. We invite you to put your own spin on this recipe. Have you tried adding a twist with different fruits or spices? We would love to hear your experiences and any variations you’ve enjoyed!


Delightful Rhubarb Scones
- Total Time: 35 minutes
- Yield: 8 scones 1x
Description
Discover the joy of baking with our delightful rhubarb scones, a perfect blend of tart and sweet that will brighten any morning. These tender scones feature fresh rhubarb and a hint of vanilla, creating a delicious treat that’s easy to make and even easier to enjoy. Perfect for breakfast or a cozy afternoon snack, these scones are sure to impress! Curious about the recipe? Click through to explore the full details and bring a touch of sweetness to your day with every bite. Get ready to savor the flavors of these delightful rhubarb scones today!
Ingredients
- 2 cups all-purpose flour
- 1/4 cup sugar
- 1 Tbsp baking powder
- 1/2 tsp salt
- 6 Tbsp cold unsalted butter, cubed
- 3/4 cup heavy cream
- 1 egg
- 1 tsp vanilla extract
- 1 1/2 cups chopped rhubarb
Instructions
Step 1: Preheat the Oven
Preheat your oven to 400°F 200°C. This initial step is crucial as it ensures your scones bake evenly and attain that golden, crispy exterior we all adore. Your kitchen will soon fill with the tantalizing aroma of freshly baked goods, preparing you for the deliciousness to follow.
Step 2: Prepare the Baking Sheet
Line a baking sheet with parchment paper. This not only prevents sticking but also makes for easy cleanup. Grab your parchment and place it on a baking sheet, smoothing out any wrinkles. You’re creating the perfect stage for your Rhubarb Scones to shine!
Step 3: Chop the Rhubarb
Dice your rhubarb into small, manageable pieces. Aim for about 1/2 inch in size to ensure they cook evenly within your scones. The vibrant pink and green hues of fresh rhubarb will inspire your inner baker, and the tartness they bring will perfectly complement the sweet scone dough.
Step 4: Mix the Dry Ingredients
In a large mixing bowl, whisk together the flour, sugar, baking powder, and salt. This combination of dry ingredients is the foundation of your scone. Take your time with this step whisking helps to aerate the flour, resulting in light, fluffy scones. The sweet aroma of sugar combined with the earthy scent of flour fills the air, setting the mood for baking.
Step 5: Cut in the Butter
Add cold, diced butter to the dry mixture. Using a pastry cutter or your fingers, work the butter into the flour until the mixture resembles coarse crumbs. This step is vital for achieving that desirable flaky texture. It’s okay to embrace the mess, the buttery goodness will be worth it!
Step 6: Fold in the Rhubarb
Gently fold in the chopped rhubarb until just incorporated. Be careful not to overmix, you want the pieces to distribute evenly without breaking down. The promise of tart, juicy pockets of rhubarb nestled within your scone dough will surely make your heart skip a beat.
Step 7: Add the Wet Ingredients
In a separate bowl, blend together cream and an egg. Pour the wet mixture into the dry ingredients, stirring gently until everything is just combined. At this point, the dough should be slightly sticky but cohesive. It’s a tactile experience embrace the feel of the dough as it comes together.
Step 8: Shape the Scones
Turn the dough onto a lightly floured surface. Pat it into a circle about 1 inch thick and then cut it into wedges or use a round cutter for classic scone shapes. Pick up each piece with care, as they are delicate, and place them on the prepared baking sheet. Visualize the delight on your friends’ faces when they taste your homemade Rhubarb Scones!
Step 9: Bake the Scones
Bake in the preheated oven for 15-20 minutes or until the tops are golden brown. Take a moment to breathe in the sweet aroma wafting through your kitchen. This moment of anticipation is what baking is all about, and soon you will be rewarded with warm, fresh goodies.
Step 10: Cool and Serve
Remove the scones from the oven and allow them to cool on a wire rack for a few minutes. Once cooled slightly, serve them warm with a touch of butter or your favorite jam. Each bite is a celebration of flavors, and you’ll find it hard to resist the second helping!
Notes
Flavor VariationsIf you’re looking to spice up your Rhubarb Scones, consider adding nuts, chocolate chips, or a sprinkle of cinnamon into the mix. Each addition brings a new layer of flavor.
Storage TipsKeep leftover scones in an airtight container at room temperature for a maximum of three days. For longer storage, freeze them, and just pop them in the oven to warm when the craving strikes.
Serving SuggestionsTry serving your Rhubarb Scones for breakfast or as an afternoon treat with tea. They can also make a charming addition to brunch gatherings, delighting guests with their bright flavors and flaky texture.
- Prep Time: 15 minutes
- Cook Time: 20 minutes
Keywords: Rhubarb Scones

